
The kitchen cabinets are in, which means it was time to order the custom counter tops! We kept it simple and cost effective by choosing a composite. We also made sure to choose something durable and that will last for quite a while. We got the referral for purchasing the counter tops from our contractor, and the retail store had a custom counter top go-to guy who we used. It was a quick process that just took the afternoon!


Cabinetry and Updates on Tile Work in the Bathroom
Cabinetry is delivered and installed! Also, the bathroom tile is continuing to be worked on. Scroll down to check out more photos!


Bonus… the exterior painting hasn’t started quite yet, but the contractors did paint the front door the pop of orange that we picked out!

Paint Picks
Here is another fun part of the entire process… picking out paint colors! We have always kept our eye open for inspiration, whether it be from Pinterest or from driving/walking around neighborhoods and store fronts. We knew we wanted to go with a modern and updated look, so we went to the paint store with a general idea of what colors we wanted.
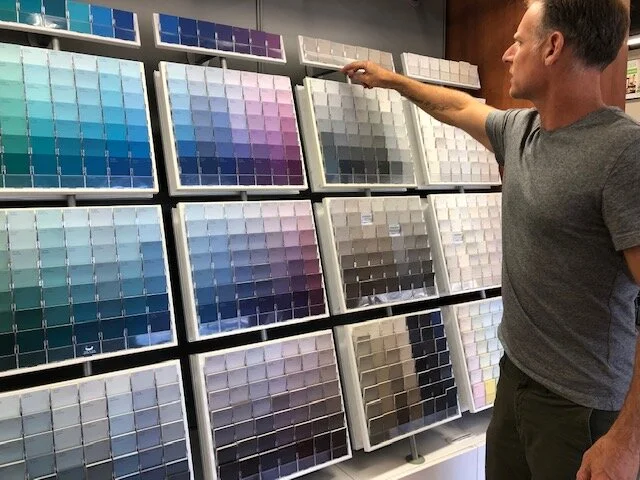
We grabbed a few paint chips that we thought we would like. From here, we narrowed it down to the shades that we liked.


It’s hard to tell what the final product will be with just a small paint chip, so it’s a good idea to get a sample of the paint once you narrow it down to something you think you will like. We painted the wall outside to get a better idea of what it will look like with an entire unit painted. We let the paint dry and revisited again the next day. After trying this process at least 2 or 3 times, we finally decided on a super dark slate blue for the exterior of the house and a pop of color for the door- bright orange!

Flooring and Tiling Phase
The stucco on the exterior is complete and walls are ready to be painted! We have reached a huge step in building the ADU… flooring and tiling! I think this is a big part of the process because now you can really see the place starting to come together and take shape. We could see the light at the end of the tunnel, so to speak!


Here are some photos of the bathroom floor being tiled. We came up with a fun diagonal design using penny tiles. Can’t wait for the final product!


Walls are ready to be painted! We also made sure to keep the beam in the ceiling to add to the aesthetic.


And finally, here are some photos of the stucco from the exterior from start to finish. It was about a 3 day process total.


4 key questions to ask now before you decide to refinance your mortgage

Finishing Drywall and Prepping for Stucco
A New Year update to the ADU! The walls are closed up and the contractors are finishing the drywall inside the house. In the photos below, you’ll see that the contractors are taping and sanding the seams to make the walls smooth so that they are ready to be painted.


In addition to the drywall being completed, the stucco is being worked on by a 3rd party that the contractors hired. Here are some photos of the stucco being prepped and worked on.


Time to Close Up Walls!
One huge hurdle down… we got another approval from the inspector including electrical and plumbing, which means walls have been closed up! The ADU is starting to take shape….


Top 10 Most Expensive Mistakes You’re Making on Your Home
Posted on Oct 25 2016 - 1:23pm by Housecall
Editor's Note: This post was originally published on October 25, 2016. Housecall continues to share this piece due to ongoing requests and reader interest.
By Cary Teller
Homes cost a lot of money to maintain. But are you spending extra money unnecessarily on upkeep? Here are the 10 most expensive mistakes you could be making in your home.
1. Using Traditional Light bulbs
If you still have incandescent light bulbs in your home, you could be throwing a lot of money away every month on inflated electric bills. Over its life span, an incandescent bulb can use $180 worth of electricity. A CFL will only use $41 worth of electricity over the same time period. Even better is the LED bulb, which only uses $30 per bulb. Think what replacing every light bulb in your home could do to your home's bottom line.
2. Ignoring a Leaky Faucet
A leaky faucet that drips one drop per second can waste more than 3,000 gallons per year, which is enough water to take more than 180 showers. Some of us live in areas where water is plentiful, but for those of us in areas plagued with drought, this could be costing you a fortune. Fix or replace your leaky faucet and save a ton on your water bill.
3. Using the Wrong Air Filter Size
We all sometimes forget to change out the air filters for our HVAC systems or accidentally buy the wrong size. But using the wrong filter or a dirty filter can increase your power bill and cause expensive problems for your furnace down the road. Use the correct filters for your system, and set a reminder to change them after the recommended amount of time. You won't regret it.
4. Not Customizing Temperature
Invest in a customizable thermostat. If you're away at the office all day, you can program your heater to shift down a few degrees while you're gone and then shift back up shortly before you return home. Heating or cooling an empty home wastes a lot of money in energy costs.
5. Not Adjusting Air Vents Properly
Is one room in your home hot, while the others are cold? Oftentimes homeowners will crank up the air conditioning in the whole house to combat hot temperatures in one area. Instead, adjust air vents to direct the flow of air more evenly throughout your entire home. Professionals will come regulate this to ensure that your entire home is receiving the same amount of air conditioning or heating.
6. Over Watering Lawn
Many homeowners have their sprinkler systems programmed to come on in the early morning hours for optimum lawn health. This can become a problem, however, if you're never around to see what you're actually watering. A broken sprinkler head could be causing a fountain, or the trajectory of your sprinkler may be directed at a fence instead of your lawn. Periodically run your sprinklers during the day so you can see how they are performing when you're not around.
7. Water Heater Temperature Set Too High
Unless you have a tankless water heater, your water heater is keeping the water in its tank hot 24/7. If you don't keep an eye on the temperature as each season changes, you may be paying too much to heat your water. Decrease the temperature in the summer, and bump it back up when winter comes.
8. Leaky Windows and Doors
Leaky windows and doors are great places for cold, winter winds to enter your home. Many homeowners simply ignore them and crank up their heaters. Caulk leaky windows and put rubber seal around doors to keep winter winds out and warmth in.
9. Paying a Handyman
Don't pay a handyman for a job that is simple enough to do yourself. If you're unsure of how to do something, look up video tutorials online. Doing simple tasks yourself can save you a lot of money.
10. Ignoring Curled Shingles
It may be easy to ignore problems on your roof, but it will only lead to bigger problems later. If you see any possible issues with your roof, repair them as soon as possible, as this will save you significant costs later.
Use these 10 tips to cut maintenance costs on your home today.


